Go
to the
table of contents
Various filters have been developed that allow the user to query the network.
For example, an interaction network can be parsed for interactions derived from
a particular experimental method. Current Osprey filters include two major types
of filters:
1.) Network Filters ( see section 5.1 Network Filters
)
Network filters deal with filtering out biological information that is
supplied to Osprey either by the user or the Grid. Currently, the network
filters consist of:
- Experimental System
- Source
- GO Process
2.) Connectivity filters ( see section 5.2 Connection
Filters )
Connectivity filters deal with filtering out nodes based on its connectivity
levels. Currently Osprey has three connectivity filters:
- Minimum
- Iterative Minimum
- Depth
The network filters work by removing nodes that do not belong to a certain
network based on the biological information retrieved from the user or the Grid.
Currently Osprey contains three major types of network filters:
- Experimental system
- Source
- GO Process
Network filters can be accessed in two convenient ways. Either by choosing
the desired filter from the overhead menu or by clicking the corresponding button
from the button in the bottom left hand frame.
|
5.1.1 Accessing Network Filters |
There are currently two different ways to access the network filters in Osprey:
1.) The Menu Bar
- Click on the "Filters" overhead menu
- Click on the "Network Filters" submenu
- Chose the appropriate filter name
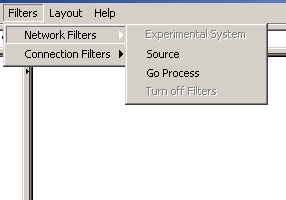
Figure 5.1.1-1 Accessing the network filters via the main
menu
2.) Bottom Left-hand Frame
- Click on the button for the desired filter located under the "Network
Filters" heading in bottom left-hand frame menu
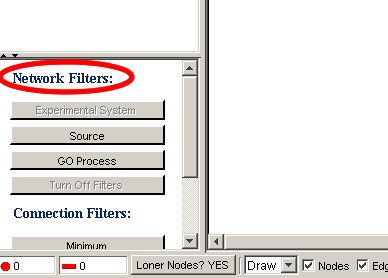
Figure 5.1.1-2 Accessing the network filters via the bottom
left-hand frame
Note: You can only access the network filters under the
following circumstances:
- Filter by "Experimental System" only works when the "Colour
by Experimental System" mode is selected, see figure 5.1.1-3. To find
out how to change the node colouring mode see section 7.3
Node Options. Also, the filter by "Source" method only works
when the "Colour by Source" mode is selected see figure 5.1.1-4.
- Similarly filter by "Go Process" only works when "Colour
Nodes by Go Process" mode is selected. To find out how to change the
edge colouring mode see section 7.4 Edge
Options
- If "User Defined" mode is chosen for edges then the network
filters, Source and Experimental System cannot be applied
- Similarly if "User Defined" mode is chosen for nodes the network
filter, Go Process, cannot be applied
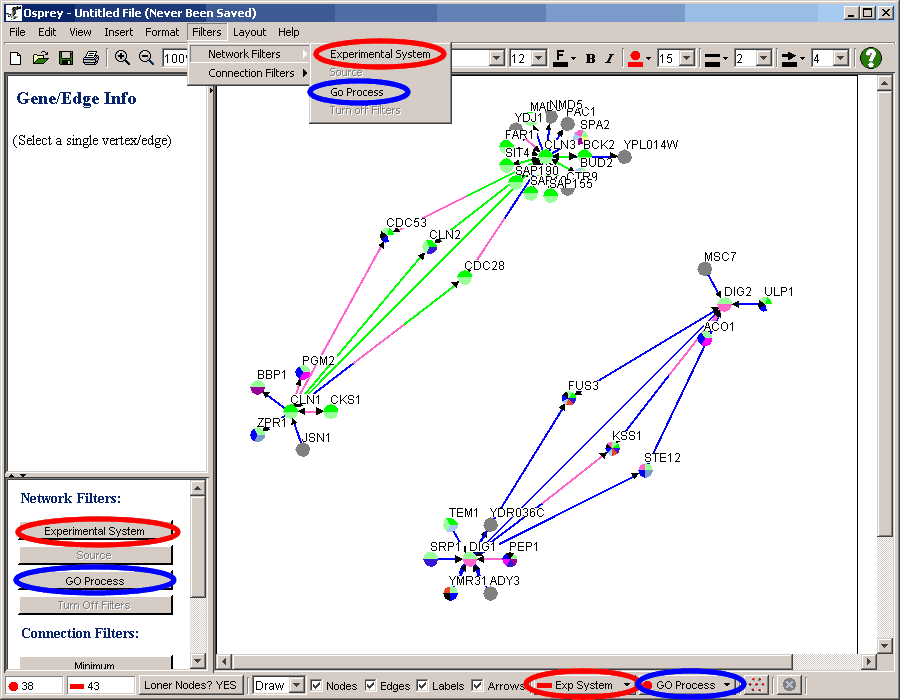
Figure 5.1.1-3 Network in "Colour by Experimental System"
mode
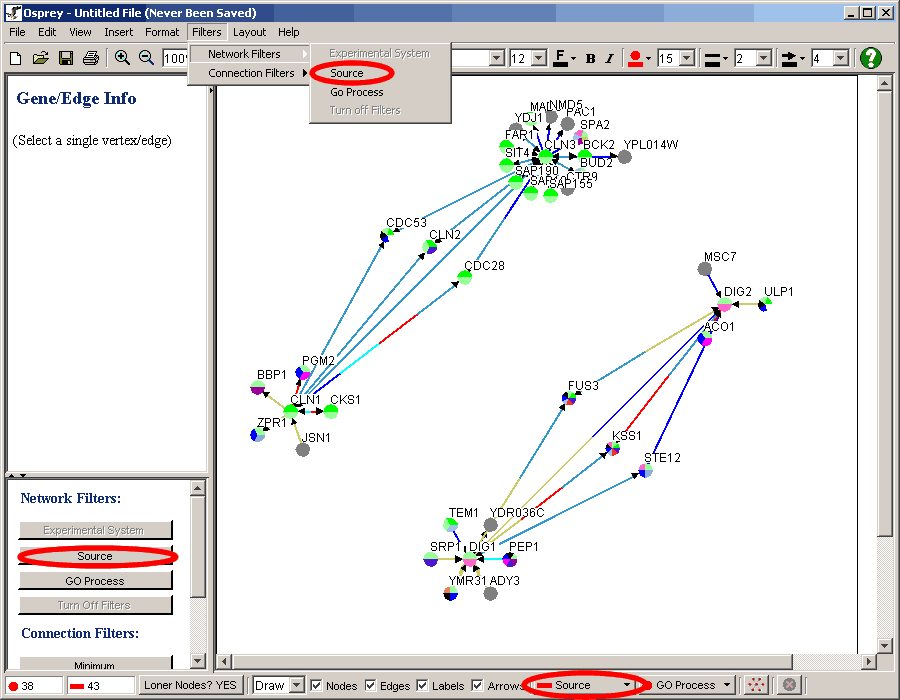
Figure 5.1.1 - 4 Network in "Colour by Source" mode
|
5.1.2 Using the Network filtering windows |
In this section we'll take you through an example of the features available
to you when filtering a network by source. Since all three of the network filters
work in a similar fashion this should give you a brief overview of how all the
network filters work.
| 5.1.2.1 Overview
of the network filtering window |
After selecting the filter by source option in Osprey you will be confronted
with a window similar to figure 5.1.2.1-1 which has the following features:
- The top list box titled "Existing Sources" contains the main list
of all the sources that are currently connecting nodes
- The bottom list box titled "Visible Sources" is a list of all
nodes that are allowed to be shown on the screen by this filter
- By default all experimental Systems are in the "Visible" list
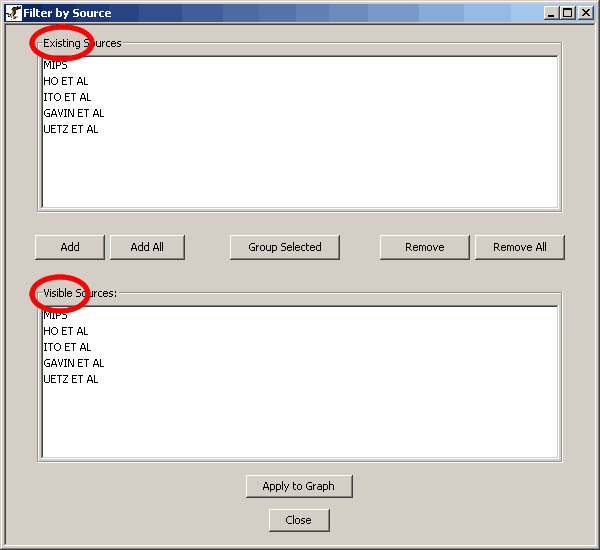
Figure 5.1.2.1-1 Filter by source window
| 5.1.2.2 Filtering
nodes out |
- To filter out one or more items click on an item in the "Visible"
list to highlight it
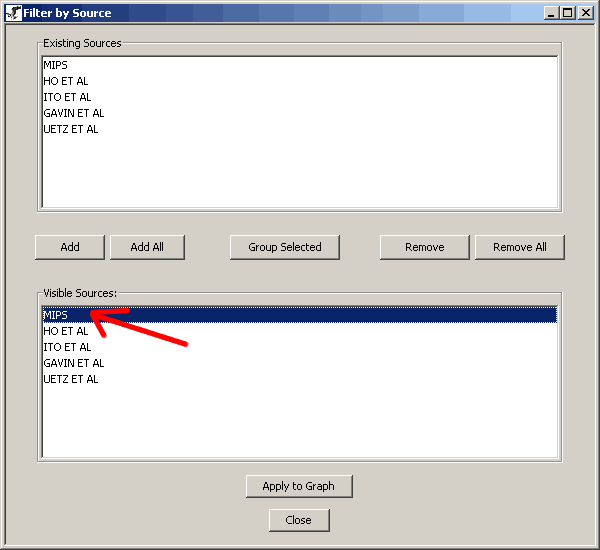
Figure 5.1.2.2-1 Filter by source window demonstrating how to
highlight something in the visible list
- To select more than one item at the same time hold the Ctrl key and click
on more items
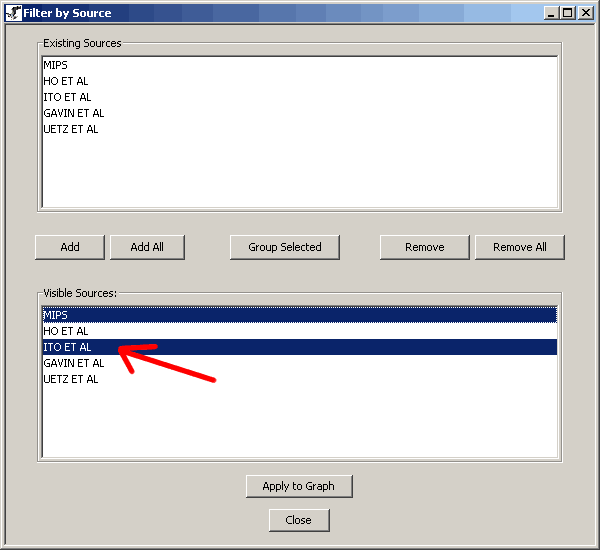
Figure 5.1.2.2-2 Filter by source window demonstrating how to
highlight multiple items in the visible list
- Then click the "remove" button (you will see the items removed
from the "Visible" list )
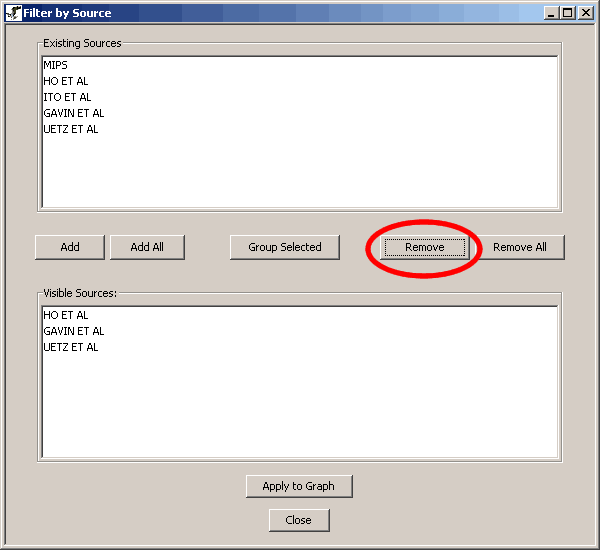
Figure 5.1.2.2-3 Filter by source window demonstrating how to
remove the highlight items from the visible list
- The "Remove all" button removes all items from the "Visible"
list
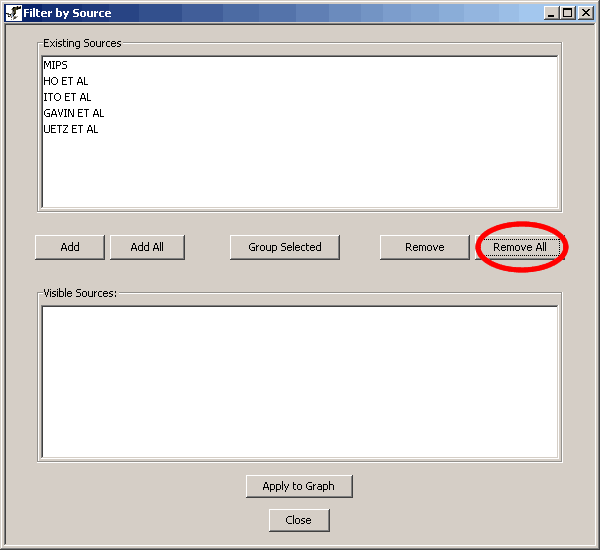
Figure 5.1.2.2-4 Filter by source window demonstrating how to
remove all the items from the visible list
- When you are ready to see the changes on the screen click the "Apply
to Graph" button
| 5.1.2.3 Adding
nodes back |
- To add one or more items to the visible list, click on the item you want
to add
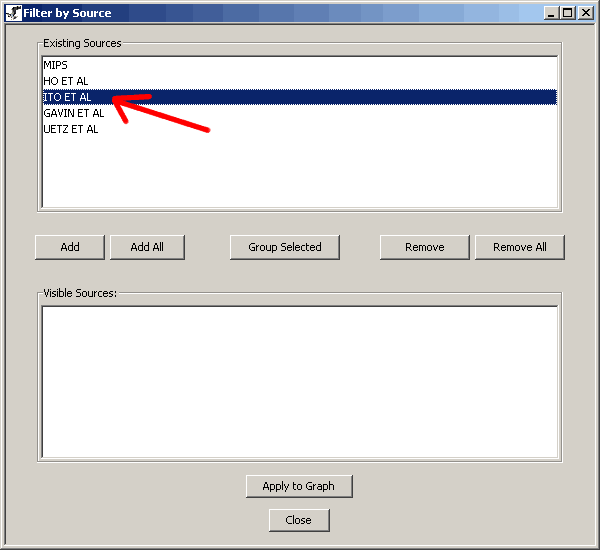
Figure 5.1.2.3-1 Filter by source window demonstrating how to
highlight something in the existing list
- To select more than one at the same time hold the Ctrl key and click on
more from the "Existing" list

Figure 5.1.2.3-2 Filter by source window demonstrating how to
highlight multiple items in the existing list
- Then click the "add" button (you will see them added to the "Visible"
list)
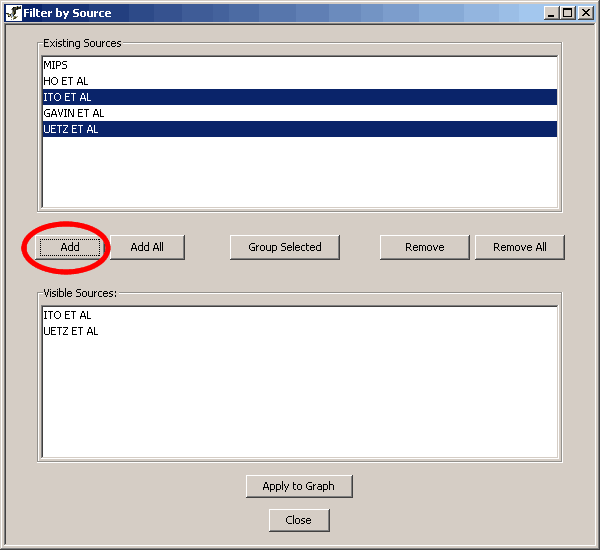
Figure 5.1.2.3-3 Filter by source window demonstrating how to
add the highlight items to the visible list by selecting the "Add"
button
- The "Add all" button adds all items from the "Existing"
list to the "Visible" list
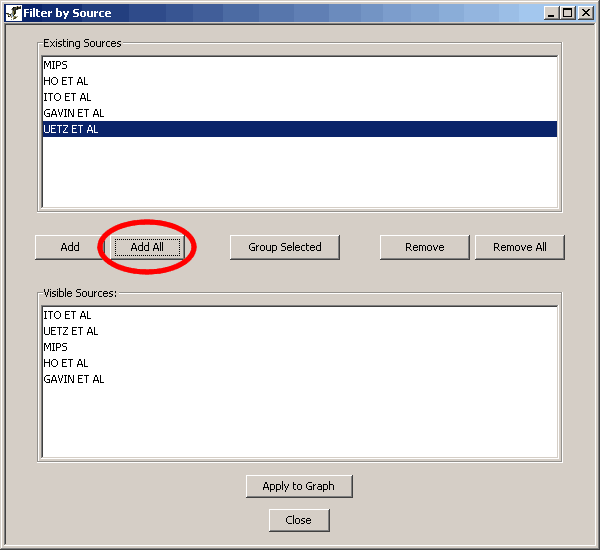
Figure 5.1.2.3-4 Filter by source window demonstrating how to
add all the items from the existing list to the visible list by selecting the
"Add All" button
- To see the changes on the screen click the "Apply to Graph" button
- Use this feature if you want to see only interactions of a group of items.
For example only interactions mentioned in source A, source B and source C
- To add a group of items to the "Visible" list choose two or more
items in the "Existing" list by holding the Ctrl button while clicking
on the items
- Then click on the "Group Selected" button. You will see the selected
items together on one line separated by "&&"
- The logic behind this is that every line is a separate condition so for
a node to be on the graph it has to satisfy (line 1) or (line 2) or (line
3) etc.
- Items on the same line must all occur to satisfy a condition. So for a node
to satisfy the condition on (line 1) it must satisfy the conditions for (item
1 on line 1) and (item 2 on line 1) and (item 3 on line 1) etc.
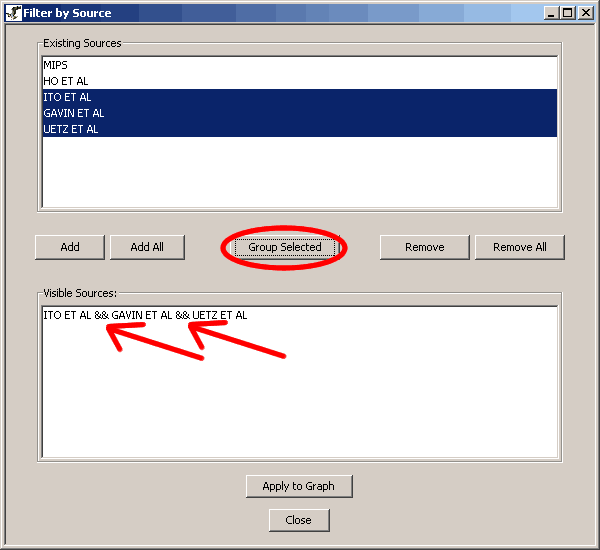
Figure 5.1.2.4-1 Filter by source window demonstrating how to
group the selected items in the existing list to the visible list by selecting
the "Group Selected" buttons
|
5.1.3 Experimental System |
The experimental systems filter helps the user to display nodes that are related
by the chosen experimental systems. See sections 5.1.1
Accessing Network Filters and 5.1.2 Using
the Network filtering windows to learn how to access and use the filter
window. The following images display an example of how to take advantage of
the experimental systems filter:
- Figure 5.1.3-1 is the original unfiltered graph coloured using Experimental
System Colours
- Figure 5.1.3-2 is the settings to filter away the Affinity Precipitation
and Dual Hybrid Experimental Systems and keep only the Synthetic Lethality
Experimental System
- Figure 5.1.3-3 is the filtered graph
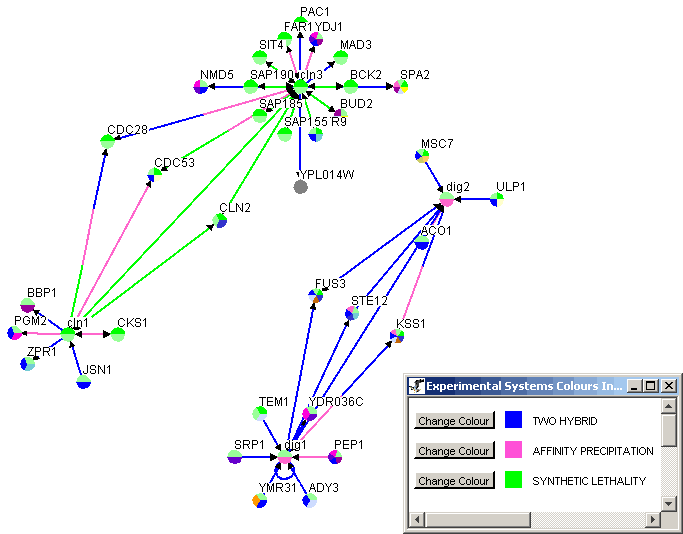
Figure 5.1.3-1 The original unfiltered graph coloured using
Experimental System Colours
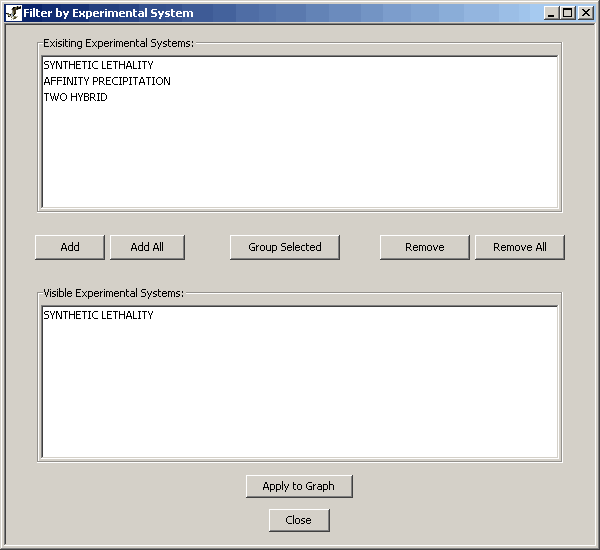
Figure 5.1.3-2 Filter settings to remove everything but Synthetic
Lethality
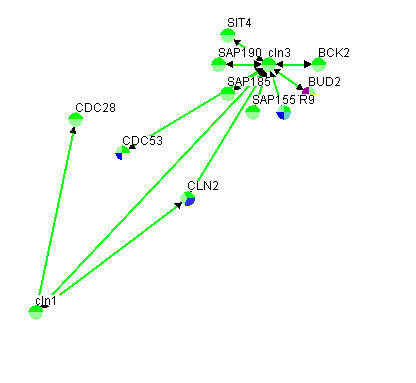
Figure 5.1.3-3 Filtered Network
The sources filter only keeps nodes that are related by the chosen source.
See section 5.1.1 Accessing Network Filters
and 5.1.2 Using the Network filtering windows
to learn how to access and use the filter window. The following images display
an example of how to take advantage of the source filter:
- Figure 5.1.4-1 is the original unfiltered graph coloured using Source colours.
- Figure 5.1.4-2 shows the Source Filter settings that remove all nodes with
sources other than (MIPS) or (Ho Et Al and Gavin Et Al and Uetz Et Al)
- Figure 5.1.4-3 shows the filtered network. Note: the edge between CLLN1
and CDC28 with 4 colours (arrow) is the edge with all three Ho Et Al and Gavin
Et Al and Uetz Et Al as sources.
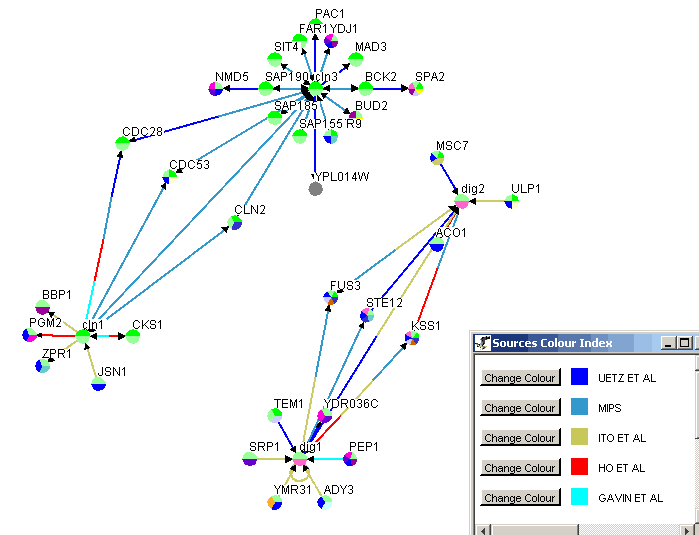
Figure 5.1.4-1 Original unfiltered graph with edges coloured
by source. The source colours are defined in the bottom right.
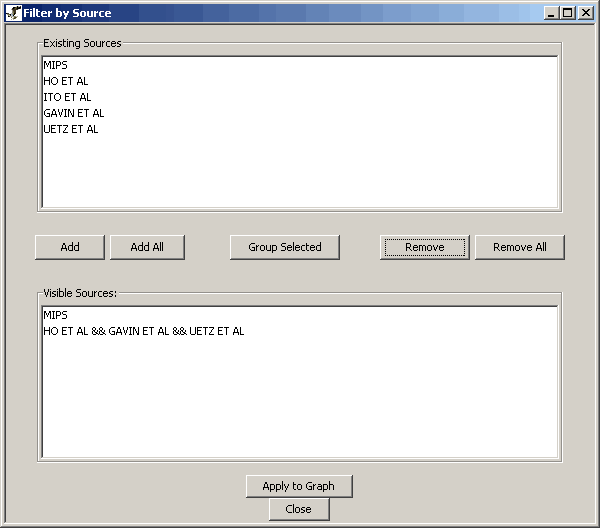
Figure 5.1.4-2 Filter Settings to remove all nodes with sources
other than MIPS or all three Ho Et Al and Gavin Et Al and Uetz Et Al
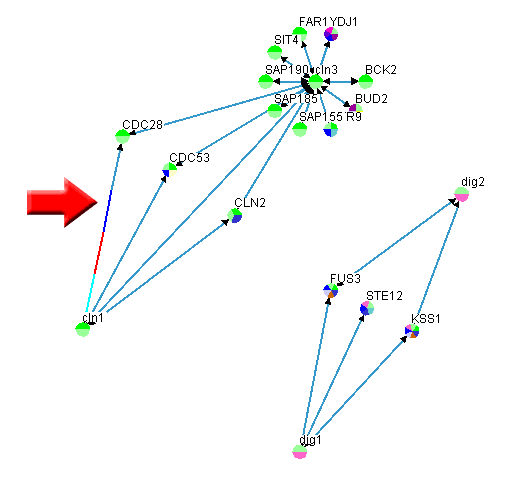
Figure 5.1.4-3 Filtered Network
The GO Process filter only keeps nodes that are related by the chosen GO Process.
See section 5.1.1 Accessing Network Filters and 5.1.2 Using the Network filtering windows to learn how to access and use the filter window.
The following images display an example of how to take advantage of the GO Process
filter:
- Figure 5.1.5-1 show the network before performing the filter
- Figure 5.1.5-2 shows the filter settings to only colour nodes that have
a GO Process of "Cell Cycle" or "Metabolism" or "unknown"
- Figure 5.1.5-3 show the actual filtered network
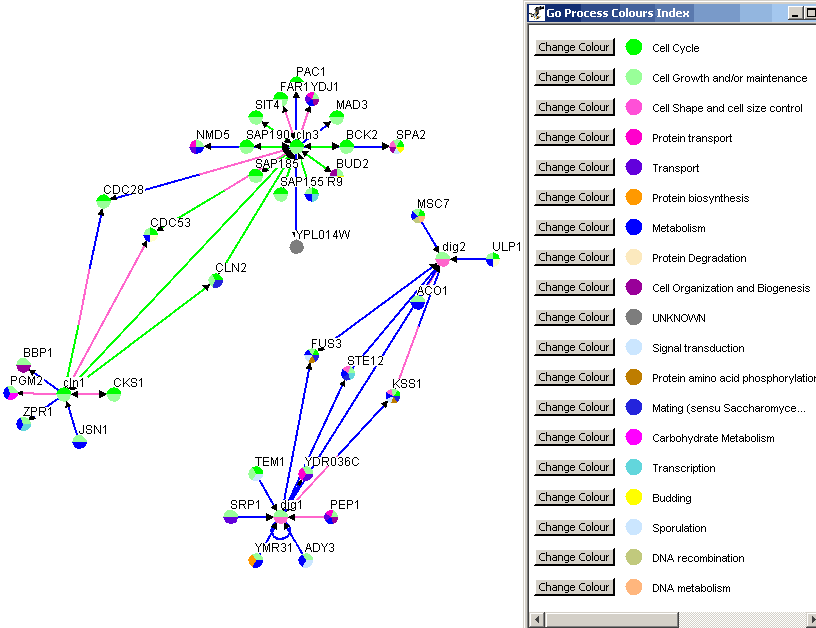
Figure 5.1.5-1 Network with node coloured by GO Process before
performing the GO Process filter
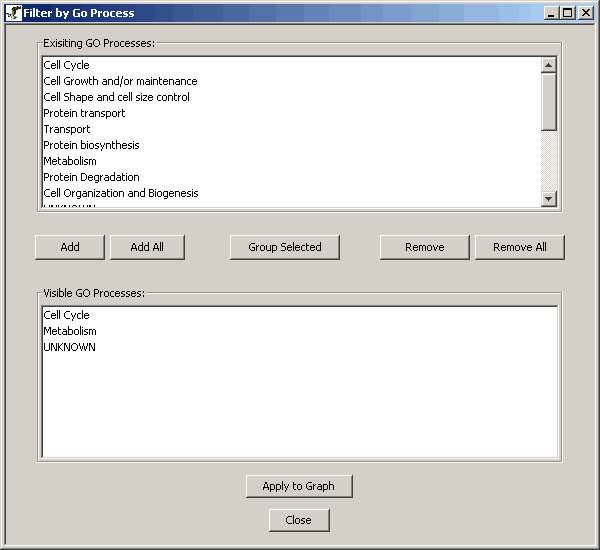
Figure 5.1.5-2 Filter settings to only keep nodes with a GO
Process of "Cell Cycle" or "Metabolism" or "unknown"
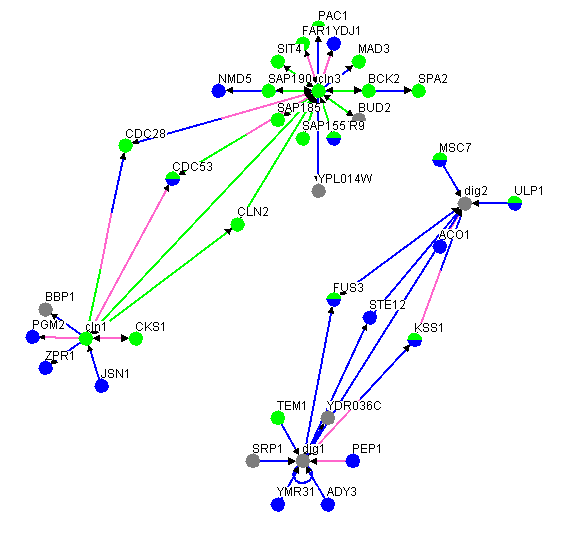
Figure 5.1.5-2 Resulting Network of the GO Process filter described
in figure 5.1.5-2
This button is located under the "Network Filters" heading on the
bottom left-hand side frame turns off all Network Filters and in the overhead
menu. It only becomes clickable when a Network Filter has been applied.
The connection filters work by checking the connections (edges) of nodes and
removing the ones that do not follow the specific connection criteria. Currently
Osprey contains three major types of connection filters:
- Minimum (see section 5.2.2 Minimum)
- Iterative Minimum (see section 5.2.3 Iterative Minimum)
- Depth (see section 5.2.4 Depth)
The connection filters can be accessed in two convenient ways. Either by choosing
the desired filter from the overhead menu or by clicking the corresponding button
from the button in the bottom left hand frame.
|
5.2.1 Accessing Connection Filters |
There are currently two different ways to access the connections filters in
Osprey:
1.) The Menu Bar
- Click on the "Filters" overhead menu
- Click on the "Connection Filters" submenu
- Chose the appropriate filter name
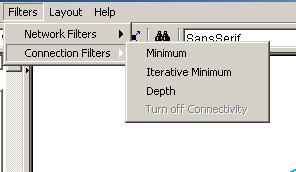
Figure 5.2.1-1 Accessing the connection filters via the main
menu
2.) Bottom Left-hand Frame
- Click on the button for the desired filter located under the "Connection
Filters" heading in bottom left-hand frame menu
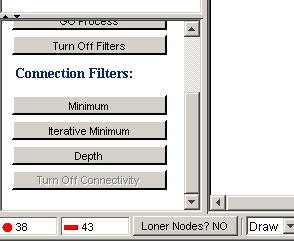
Figure 5.2.1-2 Accessing the connection filters via bottom left-hand
frame
The minimum filter only keeps nodes that have at least the minimum selected
number of edges connected to them. i.e. Nodes will be removed based on an initial
count of how many edges each node has. See section 5.2.1 Accessing Connection Filters for details on how
to access the minimum filter. The following four steps demonstrates how to use
the minimum filter:
- Click on the text box shown in figure 5.2.2-1 and type the minimum number
of edges that each node must have before you invoke this function to remain
on the screen
- Click on "Filter" button shown in figure 5.2.2-1 to perform the
algorithm
- Click on "Clear" button shown in figure 5.2.2-1 to clear the text
box
- Click on "Close" button shown in figure 5.2.2-1 to close the text
box
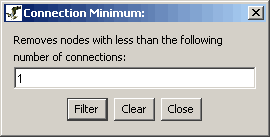
Figure 5.2.2-1 Minimum connection filter window
The iterative minimum connection filter only keeps nodes that have at least
the minimum selected number of edges connected to them after removing all nodes
with less than the minimum amount of edges. i.e. if the removal of a node caused
another node to have less than the minimum selected number it will be removed
also. See section 5.2.1 Accessing Connection Filters for details on how to access the iterative minimum filter.
The following four steps demonstrates how to use the iterative minimum filter:
- Click on the text box shown in figure 5.2.3-1 and type the number of edges
that each node must have after invoking this function to remain on the screen
- Click on "Filter" button shown in figure 5.2.3-1 to perform the
algorithm
- Click on "Clear" button shown in figure 5.2.3-1to clear the text
box
- Click on "Close" button shown in figure 5.2.3-1 to close the text
box

Figure 5.2.3-1 Iterative Minimum connection filter window
The depth filter works on selected nodes by only keeping nodes that have at
most the selected number of node connections away from the selected nodes. See
section 5.2.1 Accessing Connection Filters for details on how to access the iterative minimum filter. The
following four steps demonstrates how to use the depth filter:
- Click on the text box shown in figure 5.2.4-1 and type the maximum number
of connections deep that a node must be away from a selected node to stay
on the graph
- Click on "Filter" button shown in figure 5.2.4-1 to perform the
algorithm
- Click on "Clear" button shown in figure 5.2.4-1 to clear the text
box
- Click on "Close" button shown in figure 5.2.4-1 to close the text
box
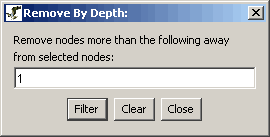
Figure 5.2.4-1 Depth filter window
|
5.2.5 Turn Off Connectivity |
This button is located under the Connections Filters heading on the bottom
left-hand side frame and in the overhead menu. It turns off all Connection Filters.
The Osprey Administrator
E-mail: ospreyadmin@mshri.on.ca
Go to the table
of contents